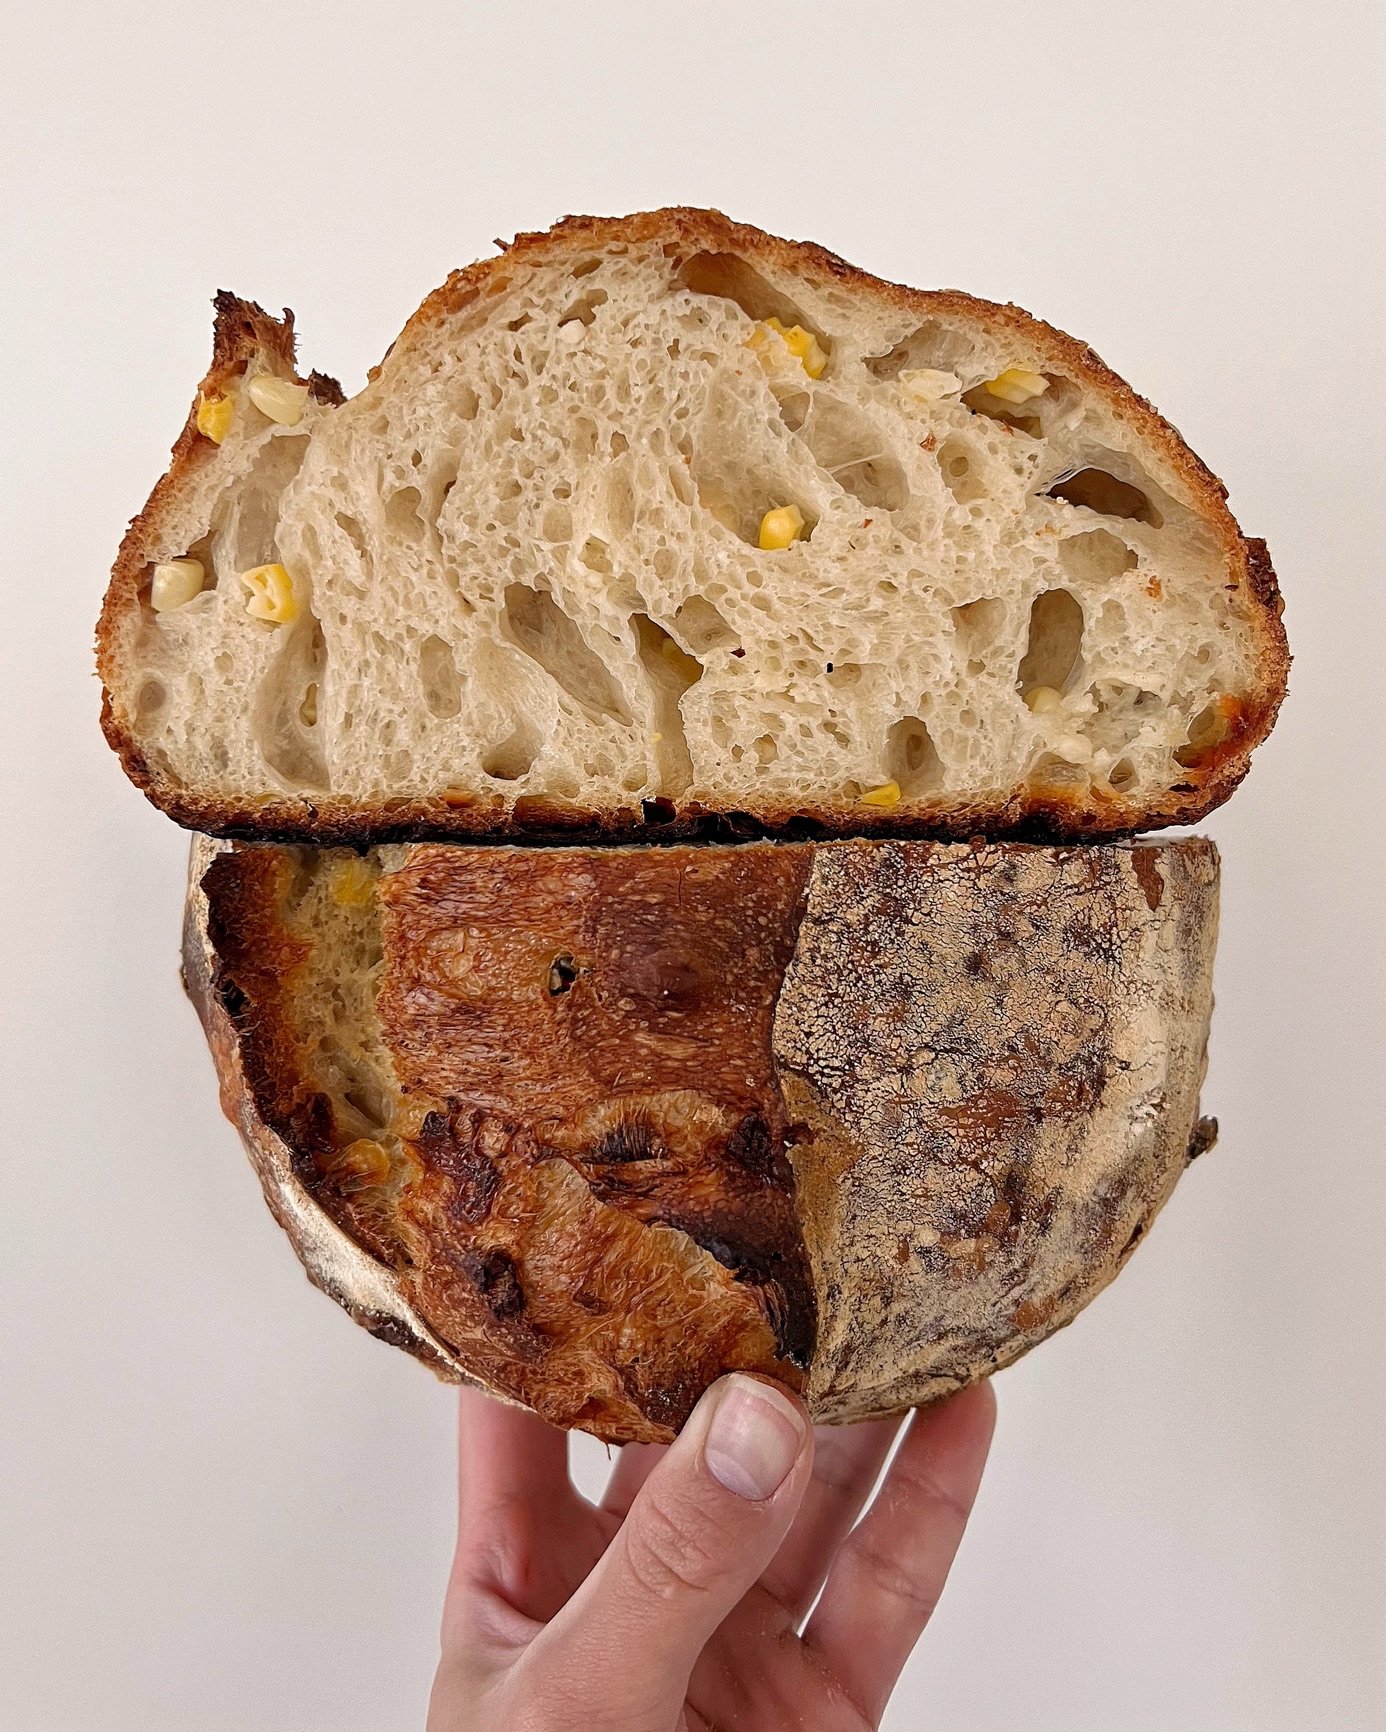
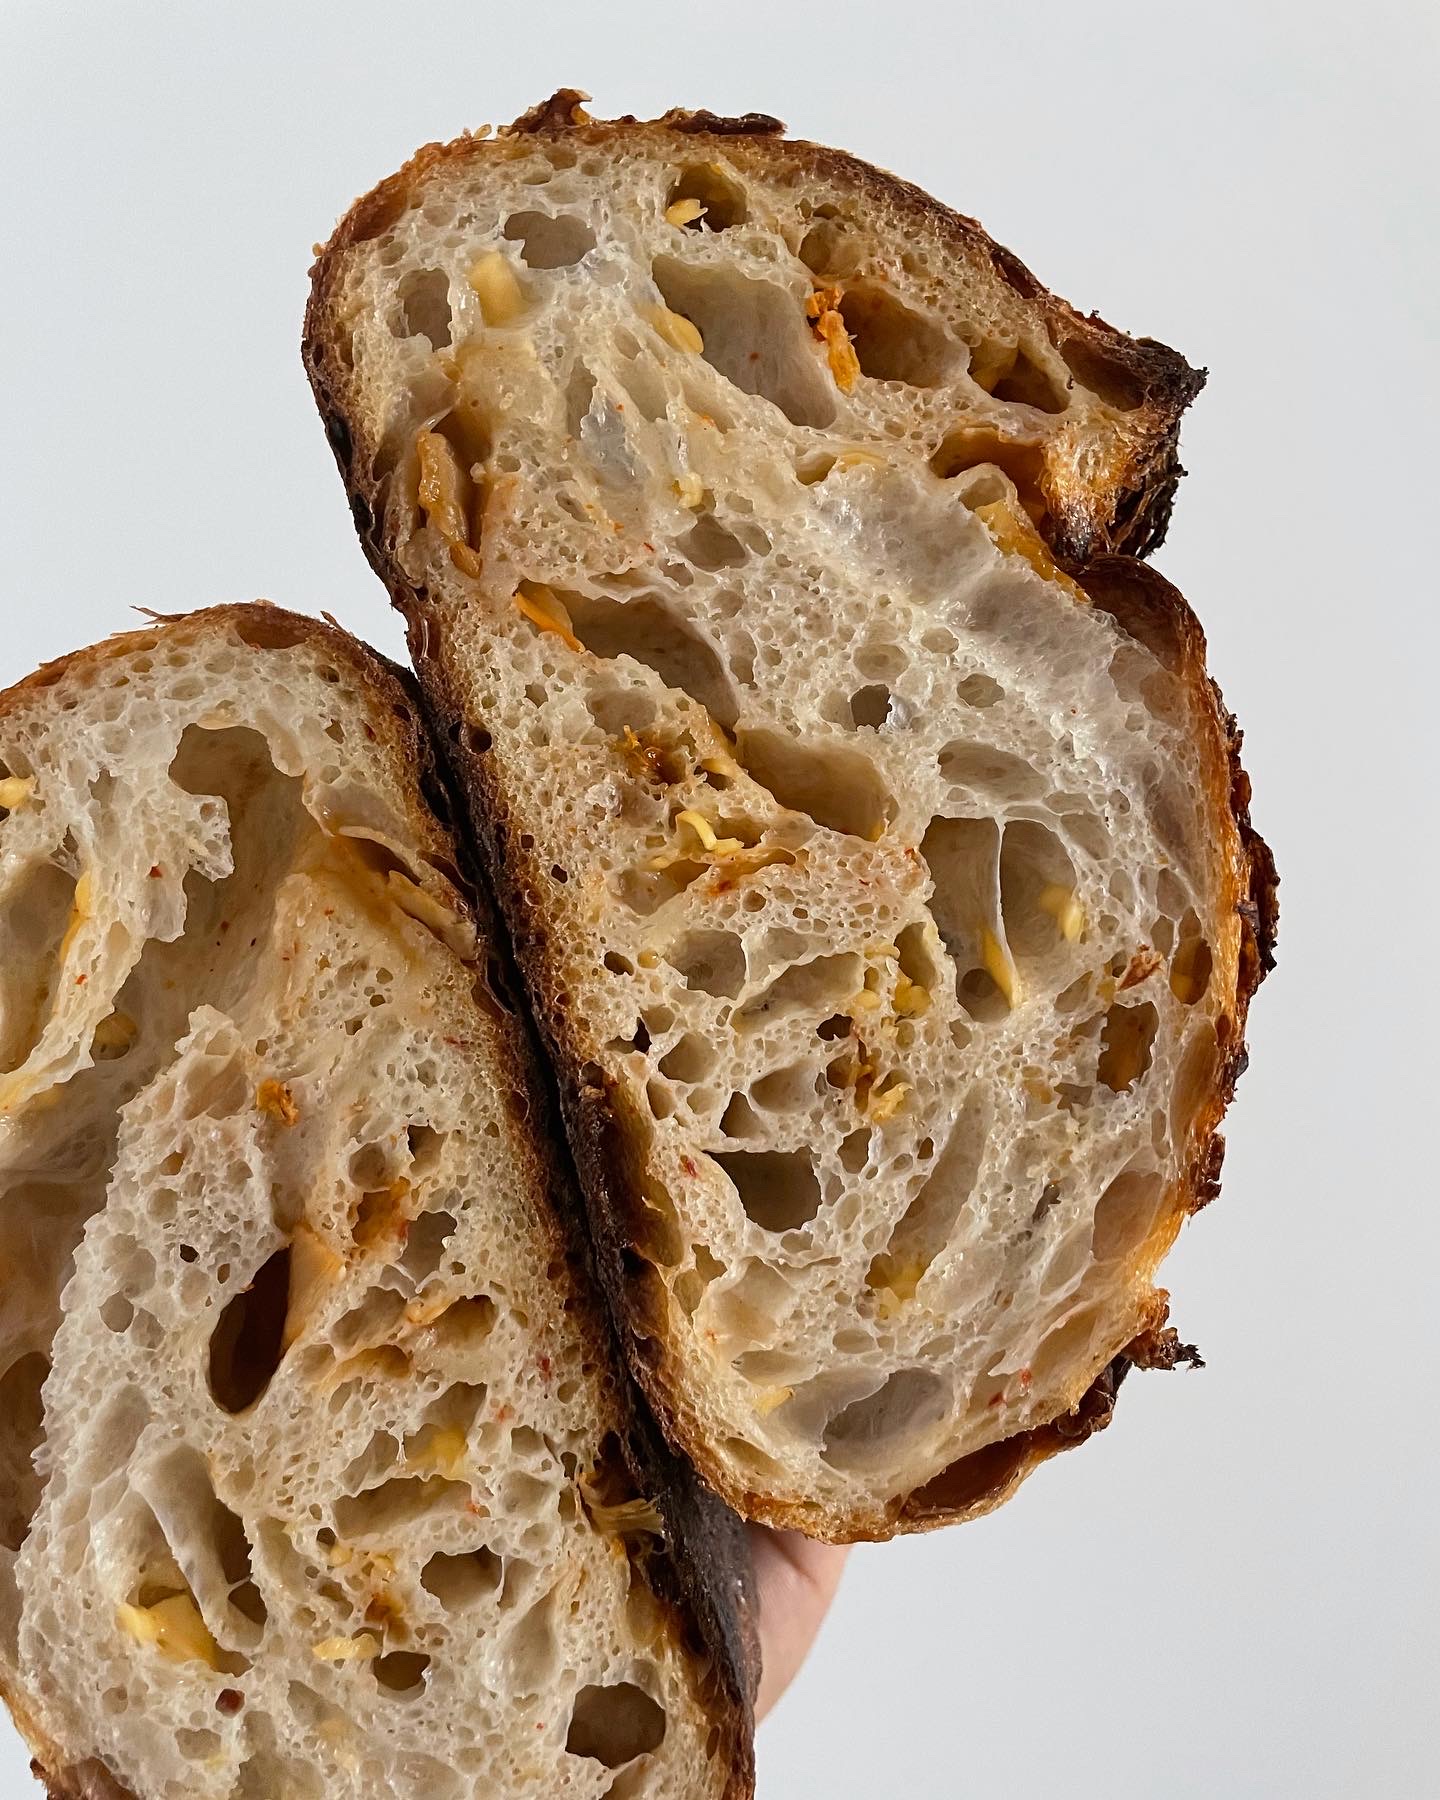
I made corn Korean Corn Cheese Sourdough Focaccia recently and love it! So, I thought, why not try the same concept in a sourdough loaf? And it turned out fantastic!
Visually, the mozzarella isn’t as noticeable in the loaf since it blends seamlessly into the crumb, but its mild, creamy flavor with a subtle tang still comes through. The corn flavor is also more delicate in the loaf, but when you bite into a kernel, you get a delightful pop of sweetness.
The overall mildness of the loaf makes it the perfect base for adding toppings, whether you’re keeping it simple or getting creative with flavors.
In this post I will be sharing my process in creating this Korean Corn Cheese Sourdough Loaf. Give me a tag on Instagram if you gave this a try!

Equipment
- bench scraper
- banneton & proofing liner
- Bread lame/razor for scoring
- 6qt dutch oven like this Lodge dutch oven
Check out this blog post for other recommended equipment: Seven essential sourdough bread making tools
The Process
Dough
- 60g levain
- 5g sourdough starter
- 30g flour
- 30g water
- 300g bread or all-purpose flour (I used King Arthur Bread Flour)
- 234g water (78% hydration)
- 6g sea salt
Lamination
- raw corn kernels
- shredded mozzarella
- diced & sautéed onions (optional)
Other
- Half rice flour and half all-purpose flour mix, for work surfaces & banneton
Day 1: Build Levain
9:30pm: Make levain by combining 5g sourdough starter with 30g flour and 30g water.
Day 2: Ferment Dough
- 8:00am: Autolayse – Mix the flour and water together, reserving 10g of water. Set aside. In a separate bowl, dissolve the salt in the reserved 10g of water and set aside. If you plan to add onions into the loaf, you can sauté them now so they have completely cooled by the time we are ready to use them.
- 8:30am: Start Bulk Fermentation – Add the levain to the flour and water. Gently squeeze and perform stretch-and-folds to evenly incorporate the levain into the dough.
- 9:00am: Mix the saltwater into the dough, then continue with stretch-and-folds to evenly distribute the salt.
- 9:30am: Stretch & Fold – Gently stretch one side of the dough up and over the top, then rotate the dough and repeat. Perform 4–6 stretch-and-folds in total. You can find a video of the stretch & fold method on this page.
- 10:00am: Laminate
- Lightly wet a work surface with a thin layer of water. Transfer the dough onto the surface and gently spread it out. If the dough tears, that’s okay.
- Sprinkle shredded cheddar cheese, raw corn kernels and sautéd onions (if using) evenly over the dough.
- Letter fold the dough: Take one long side of the dough and fold it over about two-thirds of the dough, like folding a letter. Then, fold the other side over to completely enclose the dough, completing the letter fold. Sprinkle more mozzarella, raw corn kernels and onions evenly over the folded dough. Carefully roll the dough up to complete the lamination process. Place the rolled dough seam-side down in your proofing container.
- 10:30am: Coil Fold
- At this point, the dough should feel relaxed and soft. Gently lift the dough from the center, stretching one side until it pulls free from the container. Let the free edge of the dough fold under itself, then release the dough back into the container.

- Repeat on the other end. Lift the dough from the center again, freeing the opposite end. Allow it to fold under, then gently release the dough.
- Rotate the proofing container and repeat the same process on the other side. If you’re unsure which end you’re working on, check the ends of the dough—they should look coiled (see photo). The goal is to fold these coiled ends under.

- At this point, the dough should feel relaxed and soft. Gently lift the dough from the center, stretching one side until it pulls free from the container. Let the free edge of the dough fold under itself, then release the dough back into the container.
- 11:00am: Coil Fold
- 11:45am: Coil Fold
- 12:45pm: Coil Fold –This is the last coil fold.
- 1:45pm: Shape (video)
- Lightly dust a banneton or proofing towel with a 1:1 mixture of flour and rice flour to help prevent sticking. Dust your work surface and the top of the dough with flour as well.
- Turn the proofing container upside down onto the work surface; the dough should release easily. Take the left side of the dough between your fingers, stretch it out, and fold it over the center, like a letter fold. Gently press the crease into the dough. Repeat with the right side to complete the letter fold. The dough should now resemble a rounded log.
- Next, fold the top of the dough over the center, lightly pressing down the edges. Roll the dough up, Swiss roll-style, until the seam is at the bottom. Pinch the edges together and tuck them underneath the dough.
- Using a bench scraper, flip the dough from the work surface into your hands, seam-side up, and place it into the banneton. Cover the dough and let it rest for 1 hour.
- 3:00pm: End Bulk Fermentation: ~6.5 hours at 72F. Put the dough into the fridge to retard (cold ferment) until you are ready to bake the next day ~16-19 hours.
Day 3: Bake
- 9:00am: Preheat the oven to 500F. Place the dutch oven inside.
- 9:40am: Score the bread & bake covered
- Cut the corners of a piece of parchment paper to make it easier to transfer the dough into the Dutch oven.
- Carefully flip the dough out of the proofing basket onto the parchment paper. Score the top of the dough with your preferred design and lightly spray it with water using a spray bottle.

- Take the dutch oven out of the oven and remove the lid.
- Using the parchment paper, lift the dough by its edges and carefully place it into the hot Dutch oven. Cover with the dutch oven with the lid and return it to the oven. Reduce the oven temperature to 450°F (230°C).
- 10:00am: Carefully remove the Dutch oven from the oven and take off the lid. Return the Dutch oven to the oven without the lid, allowing the loaf to continue baking.
- 10:30am: The sourdough loaf is ready when the crust is golden brown and crisp. Remove the loaf from the oven and let it cool on a wire rack for about an hour before slicing.
Related Resources
- My sourdough process: starter maintenance & baking schedule
- Seven essential sourdough bread making tools
More sourdough loaf recipes to tickle your palette


