In this blog post, I’ll walk you through the setup of my bakery pop-up. I’m not covering branding and packaging here, but I’ll focus on the essentials for creating a functional and visually appealing pop-up at a local coffee shop. Here’s how I set up my space to leave a lasting impression without breaking the bank.
Vendor/Bakery Table
A bakery pop-up, or any pop-up business for that matter, isn’t complete without a table. The size of your table depends on how much product you plan to bring, with the most common sizes being 4ft or 6ft. You can find some cheap plastic foldable tables, but I chose to splurge on this one and bought a nice wooden foldable table.
KingCamp Bamboo XL (4ft) Foldable Table from Amazon (~155)
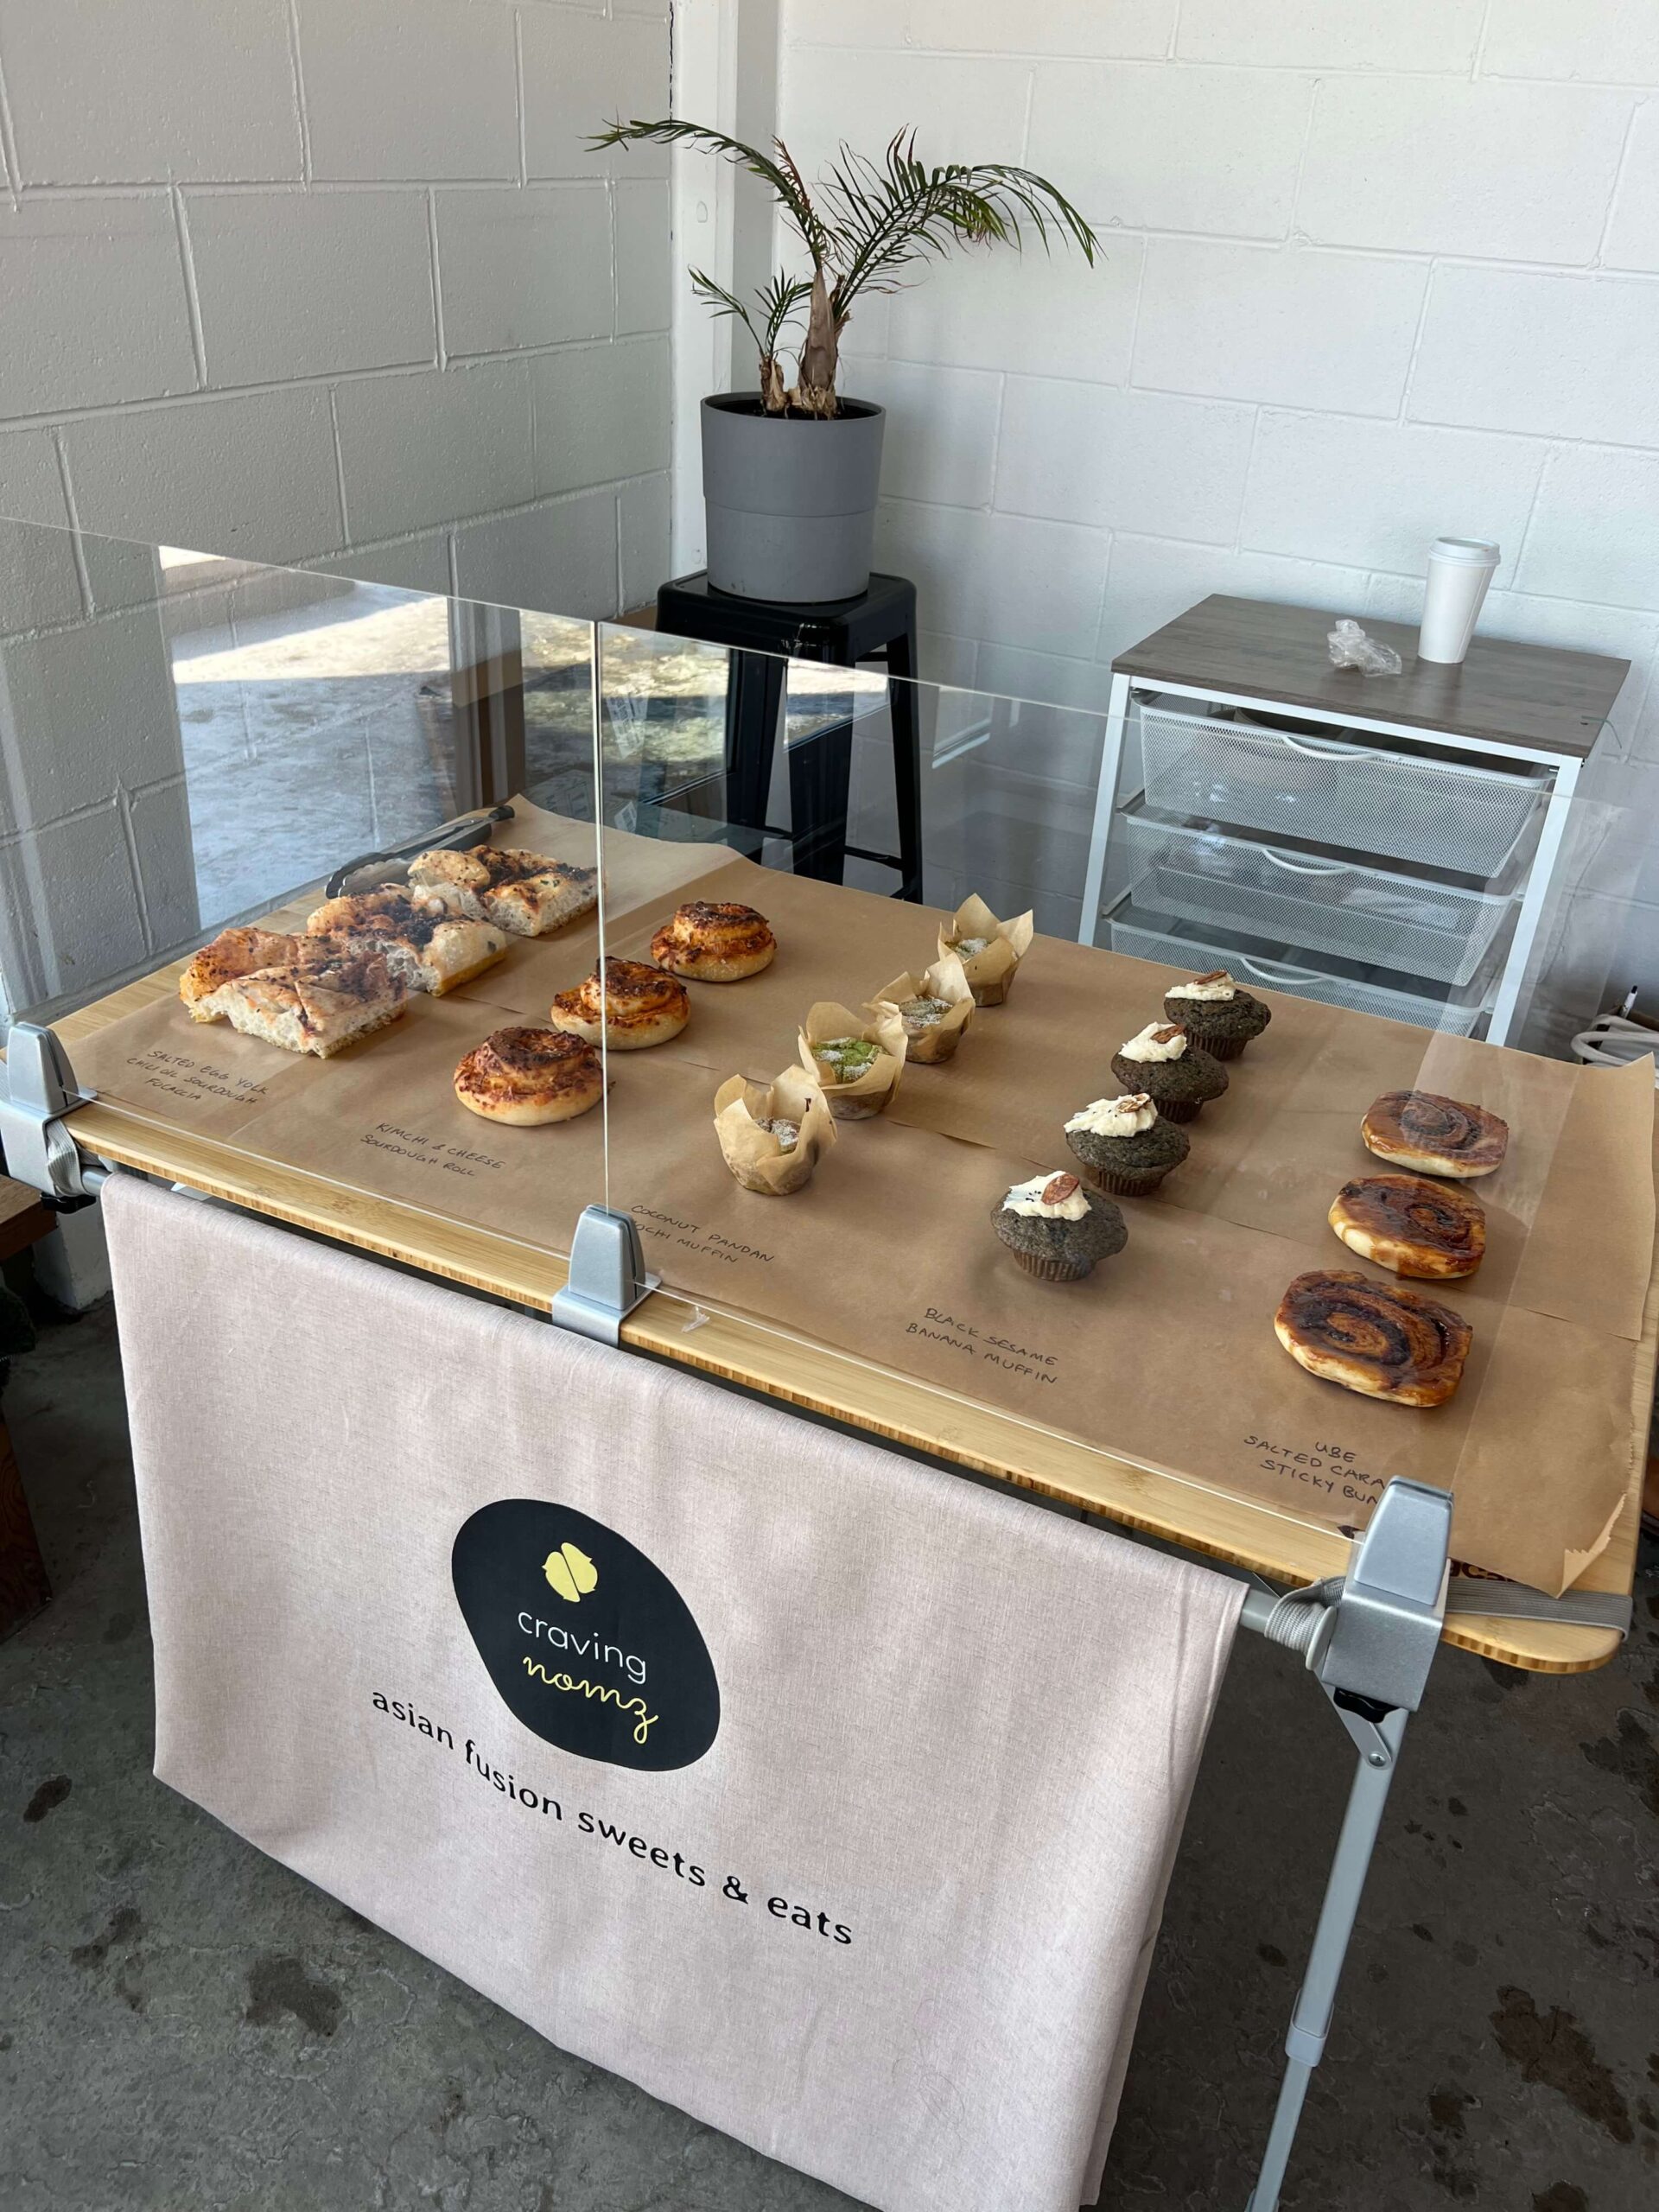
After considering several options, I chose this heavy-duty bamboo foldable table from Amazon. It’s sturdy, easy to transport, and versatile. Not only does it work for my bakery pop-up, but I can also use it for other events, like camping trips or backyard BBQs. Plus, its natural bamboo finish perfectly aligns with the earthy, minimalist aesthetic I’m aiming for. This table will last me through many pop-ups, and it adds a touch of class to my setup.

Vendor Sign
As a small business, it is important to get my brand out there to start building a customer base. For my bakery popup, I prioritized having a sturdy table and hygiene & safety, so my signage remains minimal. To keep upfront costs low, I focused on the essentials that align with my brand vision.
Branded Table Cloth: ~45
A branded tablecloth is multifunction— it hides things (boxes, the table itself etc) while also advertising my brand. In my opinion, it’s the most cost-effective and functional branding solution for a pop-up. Rather than splurging on a custom tablecloth or banner, I got creative and used a heat press logo transfer on a simple cloth. This approach allowed me to create a custom tablecloth for under $50, keeping costs low while still achieving a professional look.
- Linnen Tablecloth from Amazon ~ $13: This soft, affordable linen tablecloth is the perfect base for my custom branding. It’s high-quality enough to complement my brand’s aesthetic and works perfectly with the heat transfer method I used.
- DTF (Direct to Film) Transfers from Ninja Transfers ~30: To create a polished, branded look, I used DTF transfers. These iron-on designs from Ninja Transfers are high-quality and affordable, with prices ranging from $16 to $20 for a good size for a vendor table.

Hygiene & Safety:
For my popup, I prioritized having a sturdy table and creating a hygienic display. I envisioned an open bakery aesthetic, where the baked goods are beautifully and neatly displayed. But this means that the baked goods would be expose to the environment. I love this charming look, but it also means I need to prioritize reducing contamination. Since the bakery display cases that fit my brand’s vision were too expensive, I decided to take a more affordable approach with a simple DIY sneeze guard.
- Acrylic Sheets 18×24 (~$31) from Amazon: While pre-made sneeze guards are available, many aren’t suitable for a bakery setup. I wanted a clean, transparent glass look, and these acrylic sheets are both affordable and come in various sizes to fit my needs.
- Sneeze Guard Clamps (~$27) from Amazon: To hold up the acrylic sheets, I needed sturdy clamps. These clamps are designed to support the 1/8″ thickness of the sheets I chose, providing a secure and stable display.